Stencil Testing, Scissor Testing, and Color Write Mask
You can find the example project here.
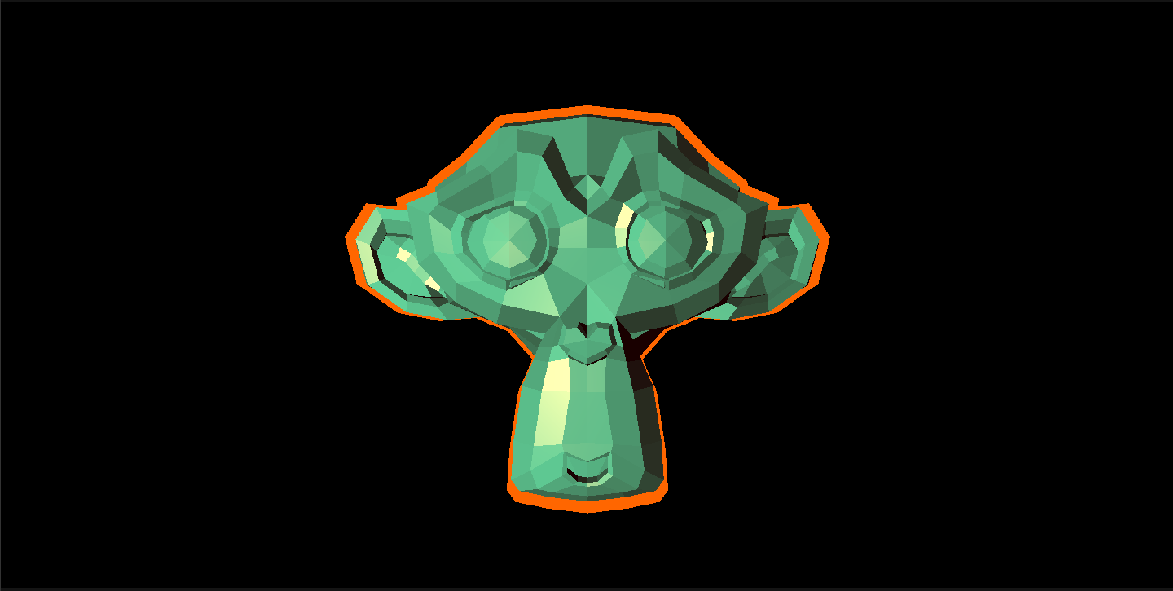
This example shows how to use stencil testing to generate a simple outline highlighting effect. We will also show how to use scissor testing and the color write mask.
Stencil Testing
Stencil testing is an OpenGL feature that allows to test the contents of a stencil buffer while rendering a fragment (pixel) and perform different operations based on the outcome of the stencil test. The stencil buffer itself is an 8bit buffer which can be updated while rendering if this is enabled.
In RamsesComposer the stencil testing and operations are controlled via the options in the Materials and MeshNodes. The Stencil Function property determines the stencil test to be performed. If set to Disabled stencil testing and stencil buffer updates are both disabled. The Stencil Ref Value and Stencil Mask Value are used in the stencil test itself. The reference value is compared with the contents of the stencil buffer for the current pixel after a bitwise AND operation with the mask value has been performed on both of them. The operation to be performed is determined by the Stencil Operation Stencil Fail, Stencil Operation Depth Fail, and the Stencil Operation Depth Succ properties. These are the operations to be performed if the stencil test fails, if the stencil test succeeds but the depth test fails, and if both the stencil and depth tests succeed.
Outline example
We can use stencil testing to generate a simple outline of an object with the following steps
Render the object normally with no stencil testing but with updates of the stencil buffer enabled. This will write a
1into the stencil buffer for every pixel of the object.Render a slight upscaled version of the same object with a simple flat shader while performing a stencil test but with no updates of the stencil buffer. The stencil test will only keep the pixel if the stencil buffer doesn’t contain a
1, i.e. only if the pixel has not been rendered to in the first pass.
The effect of this is an outline around the object as can be seen in the output of the example project above.
We first create a normal and an outline material.
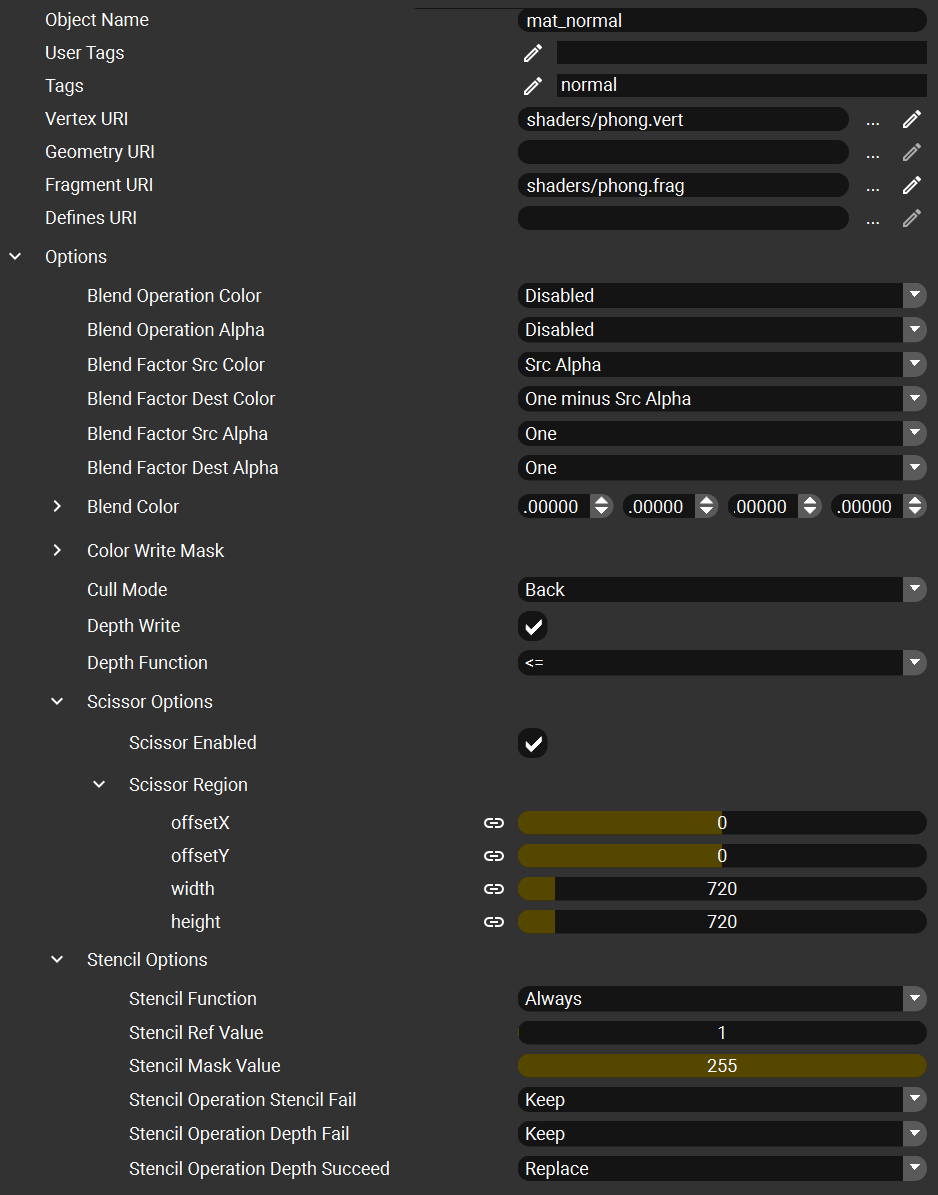
The normal material shown below will has stencil testing enabled but the stencil test is set to Always so it always succeeds. To update the stencil buffer we set the Stencil Operation Depth Succ property to Replace. This will write the Stencil Ref Value to the stencil buffer. The material is tagged with a normal tag which we use as a material filter later to allow rendering in two passes as described above. Note that we can use any shader here, the stencil operations are controlled only via the material options.

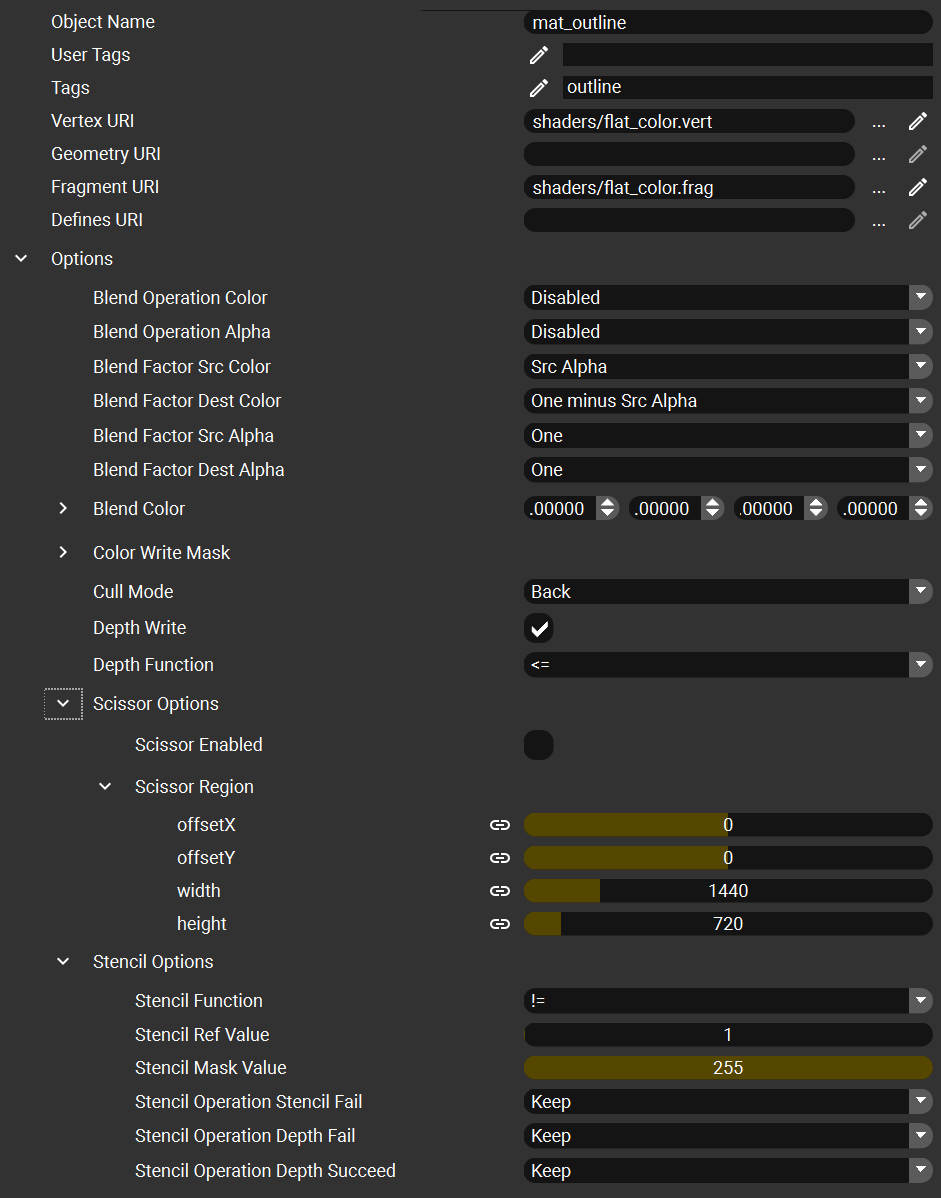
The outline material is a simple flat shader with a color chosen by a vector uniform. To enable stencil testing the Stencil Function is set to !=. The operations all have their default Keep value which means that the stencil buffer is not updated. This material will only render a pixel if it has not been rendered using the normal material previously. The outline material is tagged with outline.
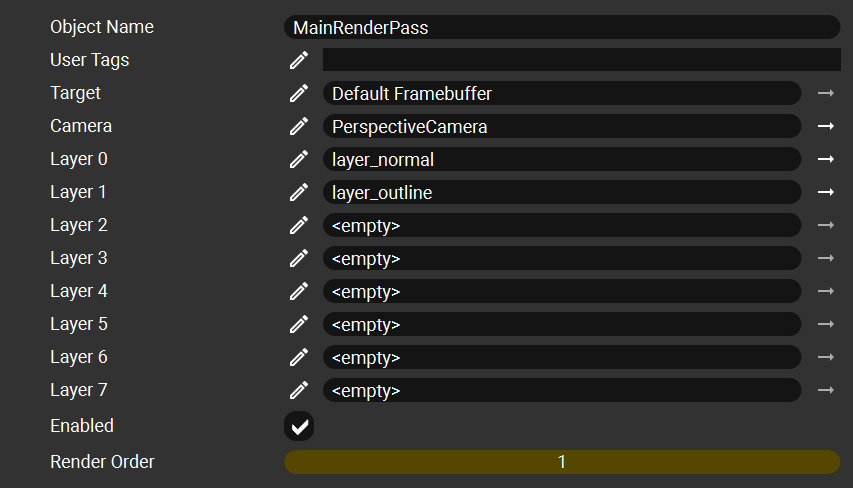
To create the two rendering passes we can use two RenderLayers in a single RenderPass. The RenderLayers use the same renderableTags and select the rendered MeshNodes using a different inclusive material filter.
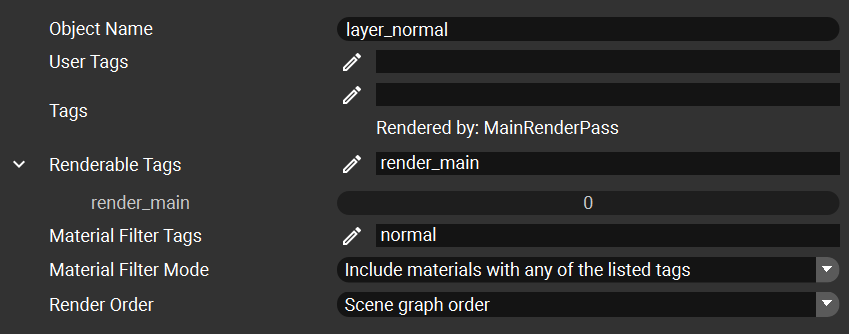
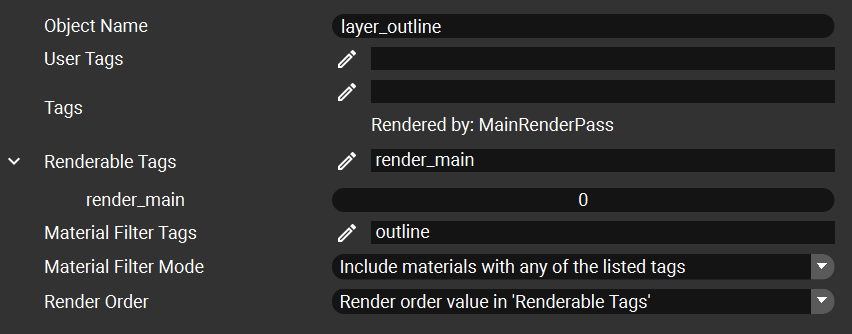
We use both of these layers in the single RenderPass. To ensure the correct ordering the layer_normal layer is the first layer in the RenderPass.
Since we use different materials in the two passes we need to make a copy of the MeshNode of the rendered object and assign the outline material to it.
The scenegraph then contains both the monkey_shaded and the monkey_outline MeshNodes under the same root node.

The result of this setup can be seen in the screenshot at the top.
Scissor testing
Scissor testing can be used to discard pixels that fall outside a rectangular region on the screen. The testing can be enabled in the Material and MeshNode options using the Scissor Enable properties. If enabled all pixels outside the region given by the Scissor Region property are discarded.
As an example we restrict the normal material to render only to the left half of the screen by setting the width property in the Scissor Region and enabling the Scissor Enable property.
Doing this in the normal material of the stencil example scene will render only half the object with the outline filling in the rest:

Color write mask
Using the Color Write Mask flags vector property in the options of the Materials and MeshNodes only some of the channels output by the fragment shader can be seletced to be written to the framebuffer.
If we disable the green channel in the normal material of the stencil example scene we get this result:
