Monkey example
You can find the example project here.
This example demonstrates a slightly more complex project than the cube. It shows how to use Lua scripts to control multiple MeshNodes at once, but still using rather simple geometry and shaders which are easy to understand and experiment with. We will explore following topics:
Materials and their properties
Lua scripts
Linking data properties
This example is built similarly to the cube hello world example,
but instead of using the default cube, it uses Suzanne, a standard Blender figure which has a
shape suitable for demonstrating and experimenting with light. You can find instructions below
how to create it yourself.
Note: Blender has its own lighting system - so does the glTF 2.0 format. We are not going to be using any of those, but instead create our own custom lights.
Let’s have a look at the contents of the project.
Scene graph and resources
After opening the project, we notice a few more things compared to the cube example:
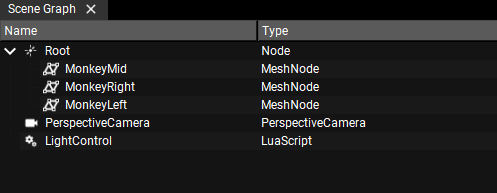
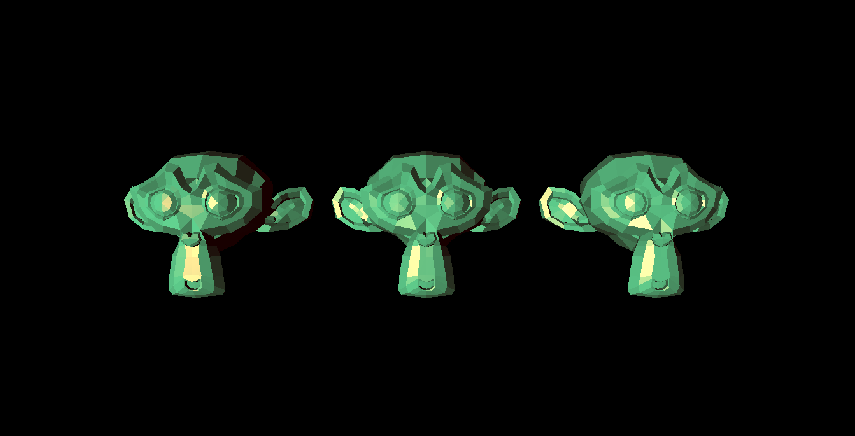
There are three MeshNodes which represent each of the monkey heads. They are referring to the same
Mesh resource (and thus the same glTF file) - you can verify that by selecting each of them and
inspecting the mesh property.
There are also other ways to instantiate the same object multiple times,
but in this example we keep things simple - just having three MeshNodes which share the same geometry.
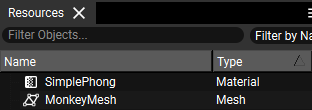
You can see the Scene Graph and the Resources views contain a Lua script - ignore it for now,
we will have a look at it in the next section.
The Resources view contains a slightly more sophisticated material, based on a so-called flat Phong shader.
Note that the material has a few properties (uniforms in OpenGL terms) in its Property view:
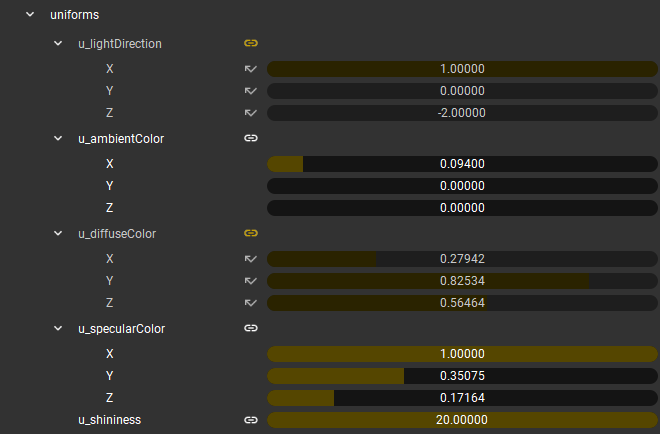
These uniforms are dynamically parsed out of the imported glSL shader (see the fragment shader. You can edit the shader in your editor of choice, and as soon as the file is saved, the Composer will reload its uniforms (or display syntax errors when there are such).
In this example, all monkey meshes share the same material (i.e. changing its properties affects all of them). If you want
that each monkey receives its own (different) material instance, you can either create three distinct material objects,
or toggle the private material property in the MeshNode settings:

Activating this option creates a separate instance of the Material assigned only to the given MeshNode.
Now what about the geometry properties?
If you inspect the MonkeyMesh resource, you will notice that it also has Normals in addition to its vertex positions:
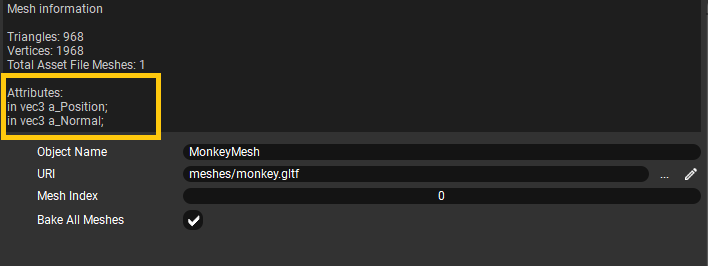
Looking at the vertex shader you can notice that it uses normal information via the a_Normal attribute variable. How does the Ramses Composer know how to link mesh attributes to shader attribute variables? We have a dedicated section which explains how to use mesh properties in vertex shaders. In this example, we need the mesh normals in order to compute the lighting of the monkey heads.
Lua Scripting
You may have noticed that the light direction and diffuse color uniforms have a link symbol highlighted
and their value boxes are greyed out and can’t be modified:
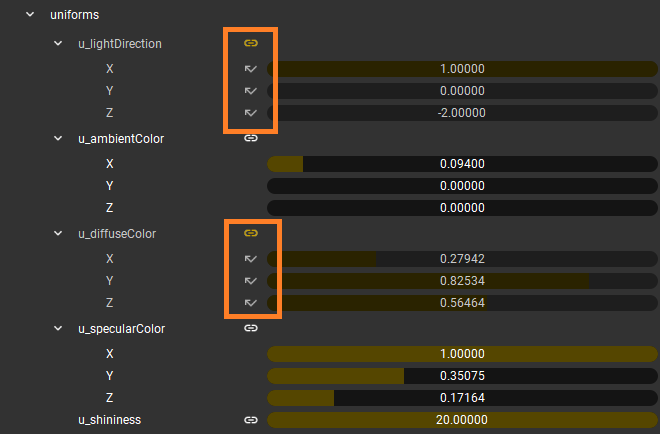
These properites have their value coming from a LuaScript object - the one we ignored earlier. If you click the link symbol, it will show the name of the script and the output property the value is linked to:
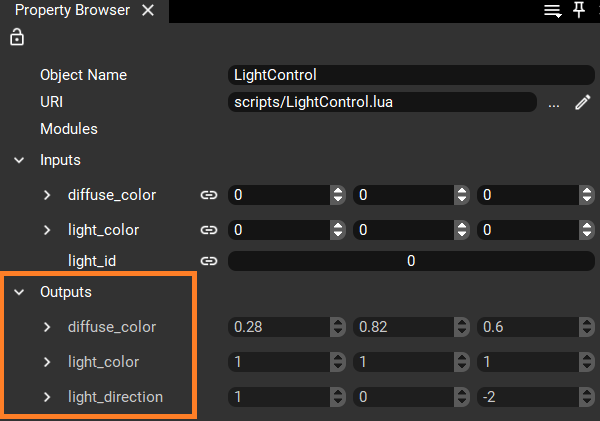
Let’s select the LightControl LuaScript from the scene graph and find the linked output in its Property browser:
Looking at the resource URI reveals that the script - similar to glSL shaders and glTF meshes, receives its content from an external file (LightControl.lua). The file contains a simple Lua script with special syntax which allows it to interact with other scripts and Ramses objects. If you are new to Lua, we recommend looking at the getting started section of the official docs. Don’t worry - if you know any other scripting language, Lua is really easy to learn! If not, it’s still quite easy.
Back to our example, the LightControl Lua script maps a set of static lights to a set of fixed directions, and emulates disco-like light colors. Let’s have a look how it does that.
Opening the script file, you will find three functions - an interface(), an init() and a run() function. Let’s
have a look at each of them.
The interface() function
Ramses Composer expects to find an interface() function in every Lua script.
The interface() declares the expected inputs and the produced outputs of the script by
adding entries in the IN and OUT global variables and specifying their type (integer, floating point number, string, etc.).
Those properties are the same you will see in the Property Browser under the Inputs and Outputs tabs respectively.
Each property receives a default value - 0 (int), 0.0 (float), "" (string), etc.. Inputs can be assigned other values in
the composer, while outputs can only be modified by the Lua script itself and are thus “greyed out” in the editor.
The run() function
The run() function is another mandatory component of every Lua script. It is executed whenever any
of the inputs changed and the outputs need re-evaluating.
In this example, the run() function sets the light direction based on the current light id and optionally the diffuse
color of the monkeys. You can modify the input values and observe the output values changing according to the script logic.
The init() function
Sometimes, it’s useful to have global variables which are initialized once and always available. The optional init()
function does just that - allows any data to be stored in the GLOBAL table and referred to either from the interface() or
from the run() functions.
In this example, we use the GLOBAL table to store a default diffuse color - one which is assigned to the corresponding
diffuse color output if no input data is provided.
What does the Lua script do?
You can modify the input values and observe the output values changing according to the script logic.
For example, you can set 0, 1 or 2 in the light_id field, and observe that the lighting of the monkeys changes. But why?
First, the run() method of the Lua script is executed whenever any of the inputs changed and the outputs need re-evaluating. In this example, the run()
method sets the light direction based on the current light id.
But which values to use? As documented above the script’s interface() method, setting light_id to 0, 1 and 2
switches the light position to different static values.
This kind of documentation is supposed to help a software developer to integrate
the asset in a real application - where these values would come from the application logic.
After run() has been executed, the outputs’ values are passed further across any links which have the outputs as source.
Remember that our Material has its uniform values for the light direction linked to the LightControl
script’s output property ‘light_direction’? These values are
dynamically obtained from the Lua script we just inspected.
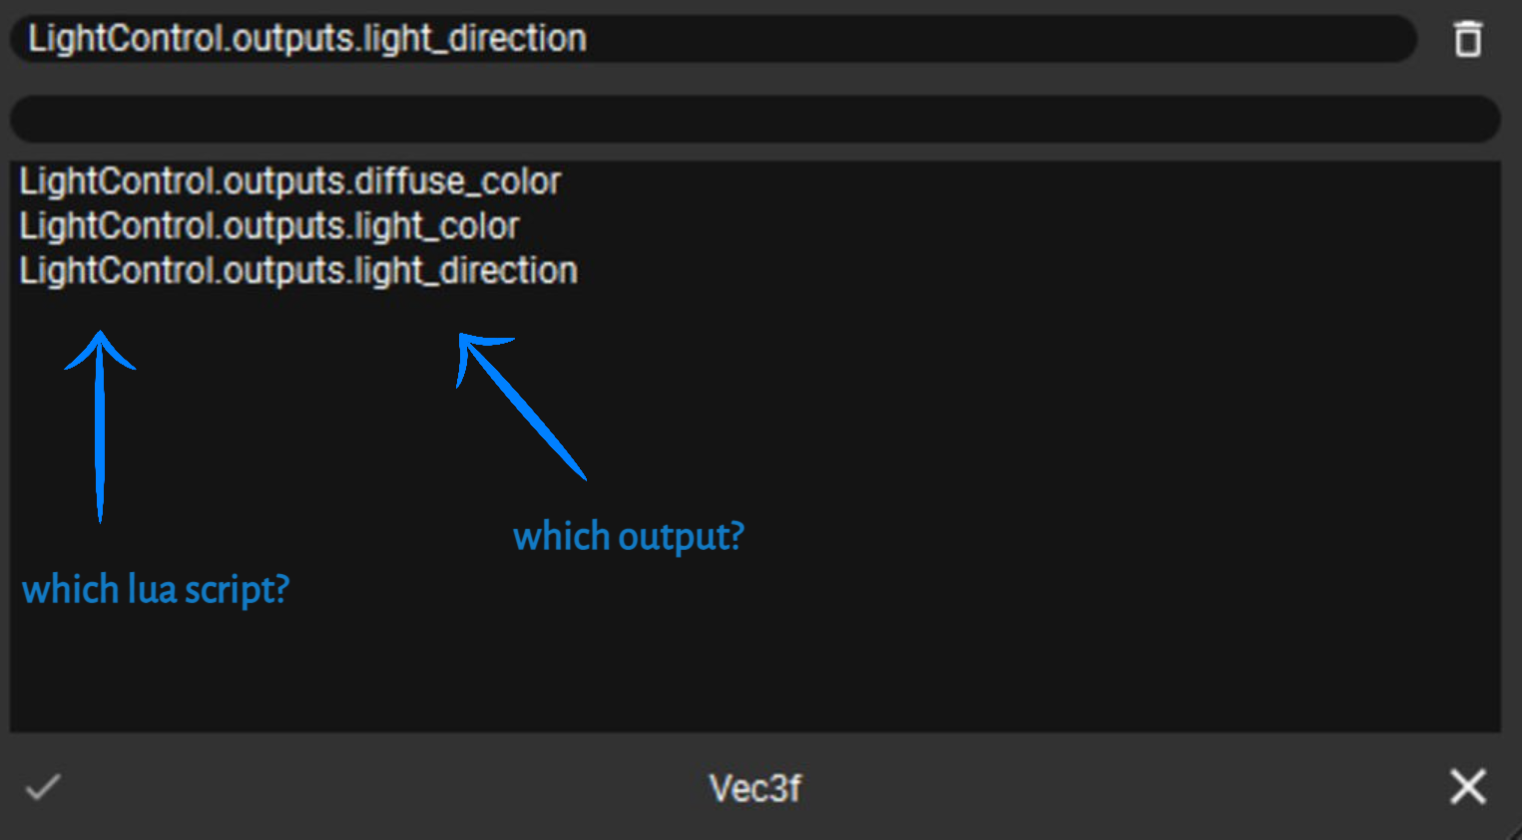
Any objects in the scene can be linked to the values produced by any LuaScript. You can add, remove and switch the
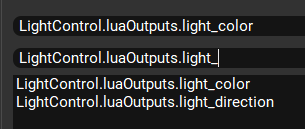
source of such links over the link icon (![]() ). If you click on it you can see a list of all the properties
with a compatible type. The popup window supports text-based search which filters all properties in the project by their name - in this case:
diffuse_color, light_color and light_direction.
). If you click on it you can see a list of all the properties
with a compatible type. The popup window supports text-based search which filters all properties in the project by their name - in this case:
diffuse_color, light_color and light_direction.
Note: only properties of a matching type are shown in the dropdown list. You can not link a property of type Type:Int32() to a property of type Type:Vec3f().
The link mechanism is designed to make it possible to control several things with a single script. If you want to have a different mapping between scripts and “linked objects”, you can create multiple instances which use the same Lua file as source, or you can use prefabs.
You can find more details and specifics on the Lua syntax and features in a dedicated section.
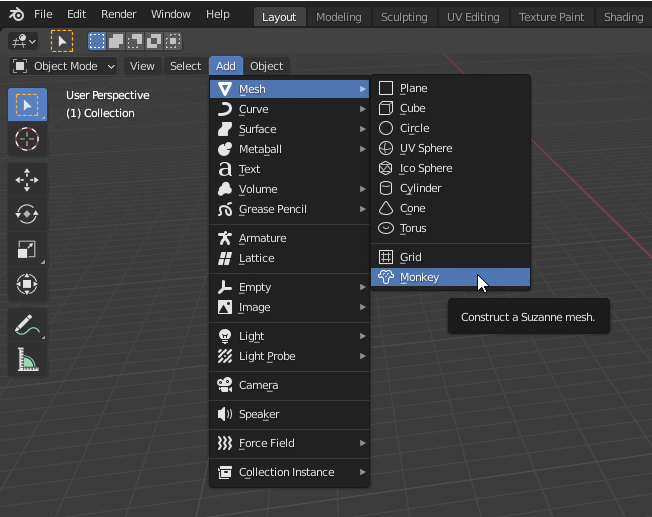
Create Suzanne in Blender
You can easily create the Suzanne monkey head in Blender - just delete the default cube (click + Del), then add it over the Add object menu:
You can export a glTF 2.0 file from Blender as described in the cube example. Make sure you select Normals in the Geometry bar, otherwise your glTF file will not have normals!
Recreate monkey sample
This example is created in a way similar to the cube example. We only highlight the steps specific to this example here:
Create a standard “Suzanne” monkey head in Blender and export as glTF (as described above)
Create a Mesh resource and set the monkey.gltf file as a source for its data
Create a Material from the Phong glSL shaders and set its uniform values (at least ambient color, otherwise the mesh will be black)
Create a Node and a MeshNode as its child
Link the MeshNode to the Mesh and Material from above
Link the light direction uniform of the MeshNode to the LuaScript’s output using the
linksymbol of the uniform propertyDuplicate the MeshNode object three times and set different translation values. Hint: you can use Copy/Paste!
Set the light_id in the LuaScript and check that it changes the lighting of the scene