Morphing
You can find the example project here.
In this section we adress the import and setup of morphed geometry from glTF files.
Introduction
Morphing is another way to modify the geometry of a mesh. While skinning affects only the transformation matrices but not the vertex positions or other vertex attributes morphing changes only the vertex attributes including the vertex positions but doesn’t modify the transformation matrices. A mesh in glTF files can define multiple sets of morph target attributes. Each morph target can contain multiple attributes already present in the unmorphed base mesh. The morph target attributes define changes to the base attributes and therefore need to be added to the base attributes. To control the morphing each morph target is weighted with a weight that can be controlled at runtime. Animations in glTF files can target not only translation and rotation node properties but also the morph weights. RamsesComposer will load the additional morph target attributes as part of the mesh loading and also supports AnimationChannels targeting morphing weights.
For further details of morphing in glTF see the glTF morphing tutorial.
Note that morphing including animations of the morph weights is only supported starting at feature level 4.
Import from glTF File
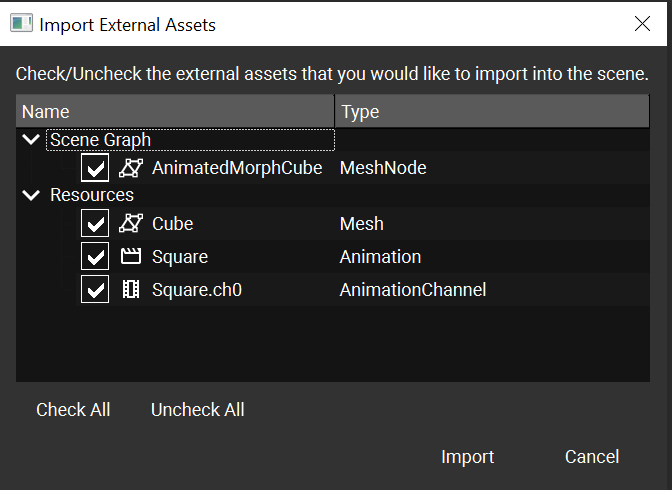
As with skinning the first step to setup morphing is the import from the glTF file. In this case no additional objects specific to morphing are present in the glTF import dialog although the animation contained in the example file targets the morph weights for the mesh as discussed below.
Looking at the imported Mesh object we see the additional morph target attributes:

In this examples there are two morph targets, and the morph targets have both position and normal attributes. The attributes for morphing follow a simple naming scheme with a postfix _Morph_N attached to the base attribute name where N=0,1,2,… is the index of the morph target.
Setting up the shader
To make use the additional morph target vertex attributes a specialized shader needs to be supplied. A template shader is included with the RamsesComposer distribution. For example, the vertex shader can look like this:
#version 300 es

precision mediump float;

in vec3 a_Position;
in vec3 a_Position_Morph_0;
in vec3 a_Position_Morph_1;

in vec3 a_Normal;
in vec3 a_Normal_Morph_0;
in vec3 a_Normal_Morph_1;

uniform mat4 u_MVPMatrix;
uniform mat4 u_NMatrix;

uniform float weights[2];

out float intensity;

void main() {
	vec3 lightdir = (vec4(normalize(vec3(1.5, -2.4, -3.0)), 0.0)).xyz;

	vec3 m_Normal = a_Normal
		+ weights[0] * a_Normal_Morph_0
		+ weights[1] * a_Normal_Morph_1;
	vec3 normal = normalize((u_NMatrix * vec4(m_Normal, 0.0)).xyz);

	intensity = max(dot(-lightdir, normal), 0.0);

    gl_Position = u_MVPMatrix * vec4(a_Position
		+ weights[0] * a_Position_Morph_0
		+ weights[1] * a_Position_Morph_1,
	1.0);
}
The weights uniform is a vector of float with the same length as the number of morph targets.
The shader needs to adapted to the number of morph targets although in this case the number of two morph targets already matches the shader. In addition the lighting calculation using the normals may have to be removed for meshes without normals.
In order to allow control of the morphing on a per MeshNode basis in RamsesComposer we need to use this shader as a private material in the morphed MeshNode:

The morphing can now be controlled manually using the weights uniform.
Animation
The Animation objects now support the animation of the weights vector used as a uniform in the morphing shader starting at feature level 4.
Looking at the imported AnimationChannel object we see the output being a component type Array with a component size of 2 which is just the number of morph targets.
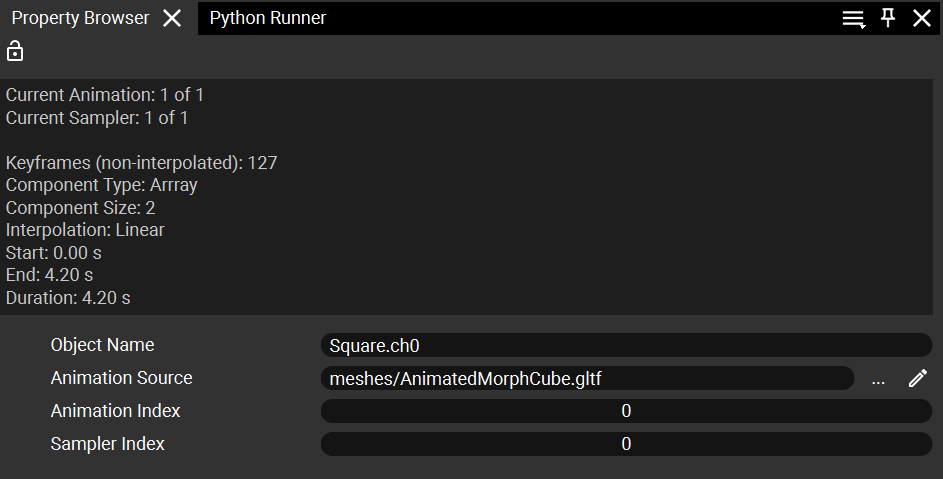
Note that at lower feature levels the animation channel and animation objects can be imported by RamsesComposer but can’t be created in the LogicEngine leading to error items. In order to use animated morph weights the project must use a feature level of at least 4.
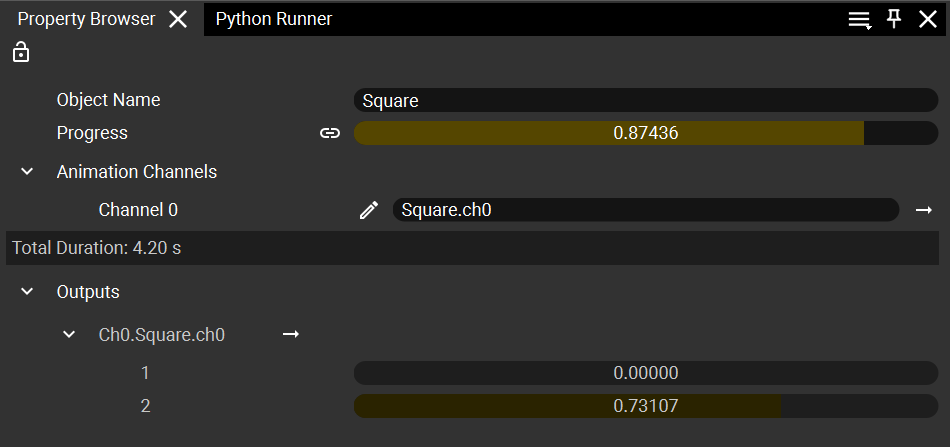
The imported animation uses this animation channel.
The last manual step is the connection of the animation channel output to the MeshNode weights uniform by a link. Once this has been done the morphing can be controlled using the Animation object progress input property.
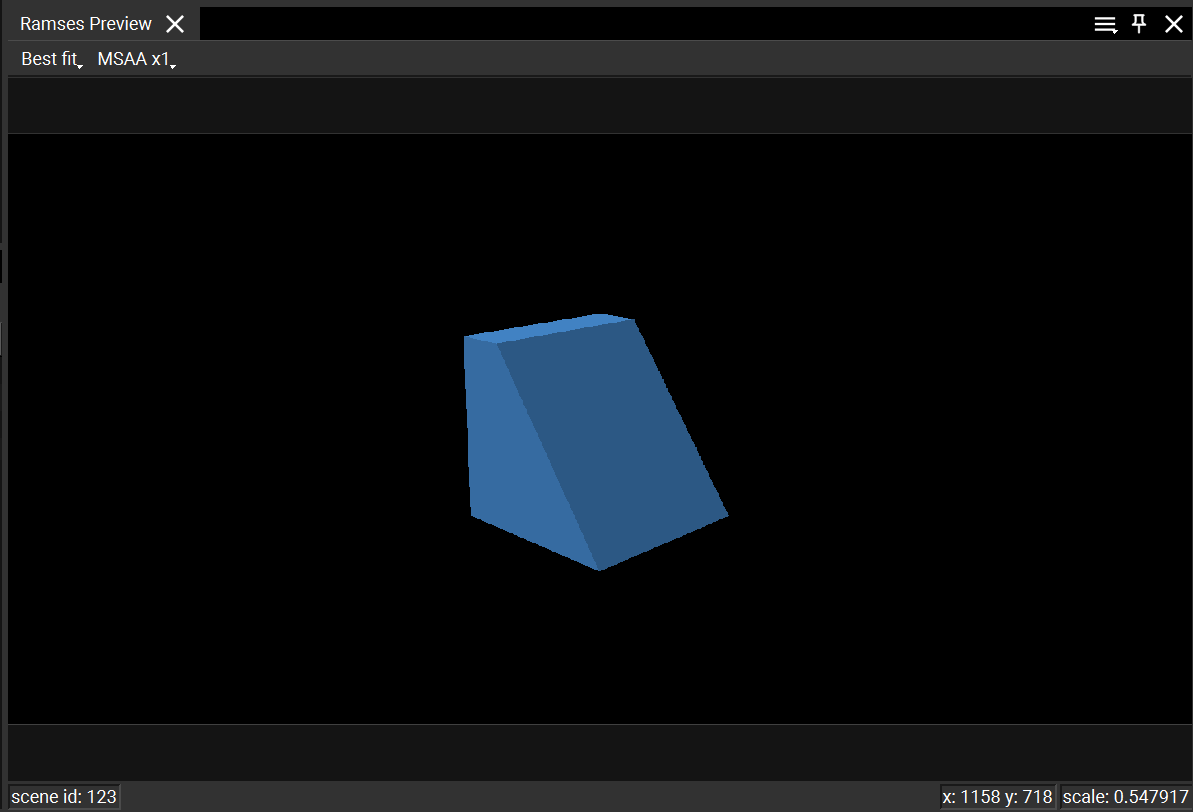
After changing the progress in the Animation object as shown above the preview now shows the morphed cube:
Limitations
While RamsesComposer can import meshes with an arbitrary number of morph targets the graphics driver will in general limit the number of attribute inputs. The limit depends on the driver used but it may be as low as 16. If the limit is exceeded shader upload errors will be shown in the RamsesComposer log window.